Water damage can be one of the most frustrating and costly issues homeowners face. Whether it’s caused by a burst pipe, a leaky roof, or flooding, water damage can lead to structural deterioration, mold growth, and unsightly stains on walls and ceilings. If left untreated, it can also compromise the integrity of your home and lead to expensive repairs.
So, how do you tackle water damage effectively? Let’s discuss the best restoration tips to repair, protect, and prevent further damage to your walls and ceilings.
Step 1: Identify the Source of Water Damage
Before starting any restoration work, it’s crucial to identify and fix the source of the water damage. Otherwise, any repairs you make will be temporary, and the problem will return.
Here’s how you can track down the source:
- Check for leaks in plumbing – Inspect pipes, sinks, and appliances like dishwashers and washing machines.
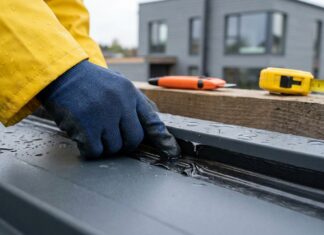
- Examine the roof – Look for missing shingles, cracked flashing, or clogged gutters that may be causing leaks.
- Inspect windows and doors – Poor sealing or damaged caulking can allow rainwater to seep inside.
- Assess your home’s foundation – Cracks or poor drainage can lead to water intrusion in walls and ceilings.
Once the source is found, repair it immediately before proceeding with restoration.
Step 2: Dry Out the Affected Area
Moisture trapped inside walls or ceilings can lead to mold growth within 24 to 48 hours. It’s essential to dry the area thoroughly before making any repairs.
Drying Techniques:
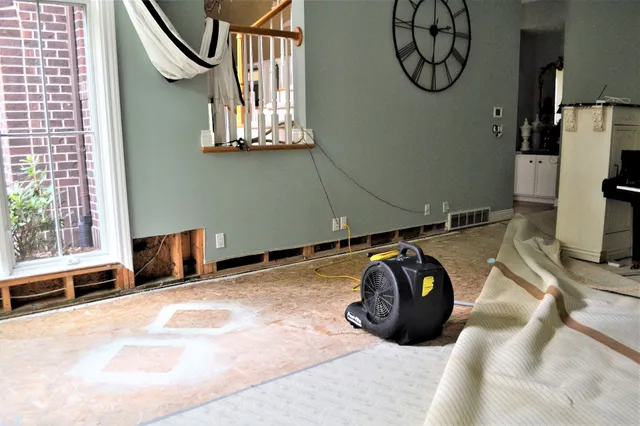
- Use fans and dehumidifiers – Place high-powered fans in the affected area to speed up evaporation. A dehumidifier helps remove excess moisture from the air.
- Open windows and doors – Increase ventilation by allowing fresh air to circulate.
- Remove wet materials – If drywall or insulation is heavily soaked, remove and replace it to prevent mold issues.
- Use towels and mops – For minor water damage, absorb excess water with towels and wring them out frequently.
Pro Tip: If you’re dealing with significant flooding, consider hiring professional water damage restoration services to ensure thorough drying.
Step 3: Inspect for Mold and Mildew
Water-damaged walls and ceilings create the perfect environment for mold and mildew to thrive. Even if the surface looks dry, moisture trapped inside can promote mold growth.
How to Check for Mold:
- Look for dark spots or greenish-black stains on walls and ceilings.
- Notice any musty odors in the affected area.
- Feel the surface – if it’s damp to the touch, mold might already be forming inside.
Mold Removal Tips:
- For small mold spots: Use a mixture of water and white vinegar or a mold-killing solution to scrub the affected area.
- For larger infestations: You may need to remove and replace sections of drywall or insulation.
- When in doubt, call a professional: Mold remediation experts can safely remove mold and prevent further spread.
Step 4: Repair and Restore Walls and Ceilings
Once the area is completely dry and free from mold, it’s time to restore your walls and ceilings. The type of repair depends on the extent of the damage.
Patching Minor Water Damage (Stains & Small Cracks)
- Clean the surface – Use a mild detergent to remove stains and dirt.
- Apply a stain-blocking primer – This prevents discoloration from seeping through new paint.
- Repaint the area – Match the existing wall or ceiling color for a seamless finish.
Fixing Peeling Paint or Bubbling Drywall
- Scrape off damaged paint – Use a putty knife to remove loose paint or drywall.
- Apply joint compound – Fill in cracks or bubbles with a thin layer of joint compound and smooth it out.
- Sand the surface – Once dry, sand it down for an even finish before repainting.
Replacing Severely Damaged Drywall
- Cut out the damaged section – Use a drywall saw to remove the affected area.
- Install a new drywall patch – Secure it with drywall screws and tape the seams.
- Apply joint compound and sand it – Create a smooth surface before priming and painting.
Step 5: Prevent Future Water Damage
Now that your walls and ceilings are restored, take steps to prevent water damage from happening again.
Maintenance Tips:
- Inspect your roof regularly – Check for missing shingles, cracks, or blocked gutters.
- Seal windows and doors – Use weather stripping or caulk to prevent leaks.
- Check plumbing for leaks – Regularly inspect pipes, faucets, and water heaters.
- Monitor humidity levels – Keep indoor humidity below 50% to prevent condensation buildup.
- Upgrade drainage systems – Ensure proper grading around your home to direct water away from the foundation.
When to Call a Professional
While minor water damage repairs can be handled on your own, some situations require professional help:
- Structural damage – If walls or ceilings are sagging, they may be unstable and need expert assessment.
- Severe mold infestation – If mold has spread behind walls, professional remediation is necessary.
- Extensive flooding – Large-scale water damage often requires industrial-grade drying and restoration.
For homeowners looking for expert home restoration in Anderson SC, Premier Construction and Restoration offers reliable solutions. Their experienced team ensures thorough water damage repair, mold remediation, and long-term structural integrity for your home.
Final Thoughts
Water damage to walls and ceilings can be frustrating, but with the right approach, you can repair and prevent future problems effectively. By identifying the source, drying the area, addressing mold, and making necessary repairs, you can restore your home and keep it protected.
Have you dealt with water damage in your home? What restoration methods worked best for you? Let’s discuss!
Apart from that if you want to know about Best Retaining Wall Contractors then please visit our Small business Category.